GKE (Google Kubernetes Engine)
There is a guide offered by Google Cloud for creating a new Kubernetes cluster using their Google Kubernetes Engine (GKE). You can reference the link below if you'd like the full guide and documentation. For the sake of this installation guide we'll be providing a high level summary of the steps you'll need to take using their guide.
note
The GKE Quickstart guide assumes that you have a basic understanding of Kubernetes
Getting started with GKE#
GKE now offers two modes of operation:
- Standard: Gives you full control over your cluster nodes with the ability to fine tune and run custom administrative workloads.
- Autopilot: A newer mode that is a hands-off and fully managed. No worrying about configuring and monitoring your cluster’s infrastructure.
The operation mode we'll use in this guide is the Autopilot, but first we need to ensure your Google Cloud account is configured for GKE.
Configuring Google Cloud#
You can configure your Google Cloud account for GKE in the following steps. If you do not already have an account you can create one here and potentially receive a $300 credit towards evaluating different Google Cloud solutions like GKE.
- Create a new Google Cloud project (recommended)
- Enable Google Cloud APIs
Creating a new project#
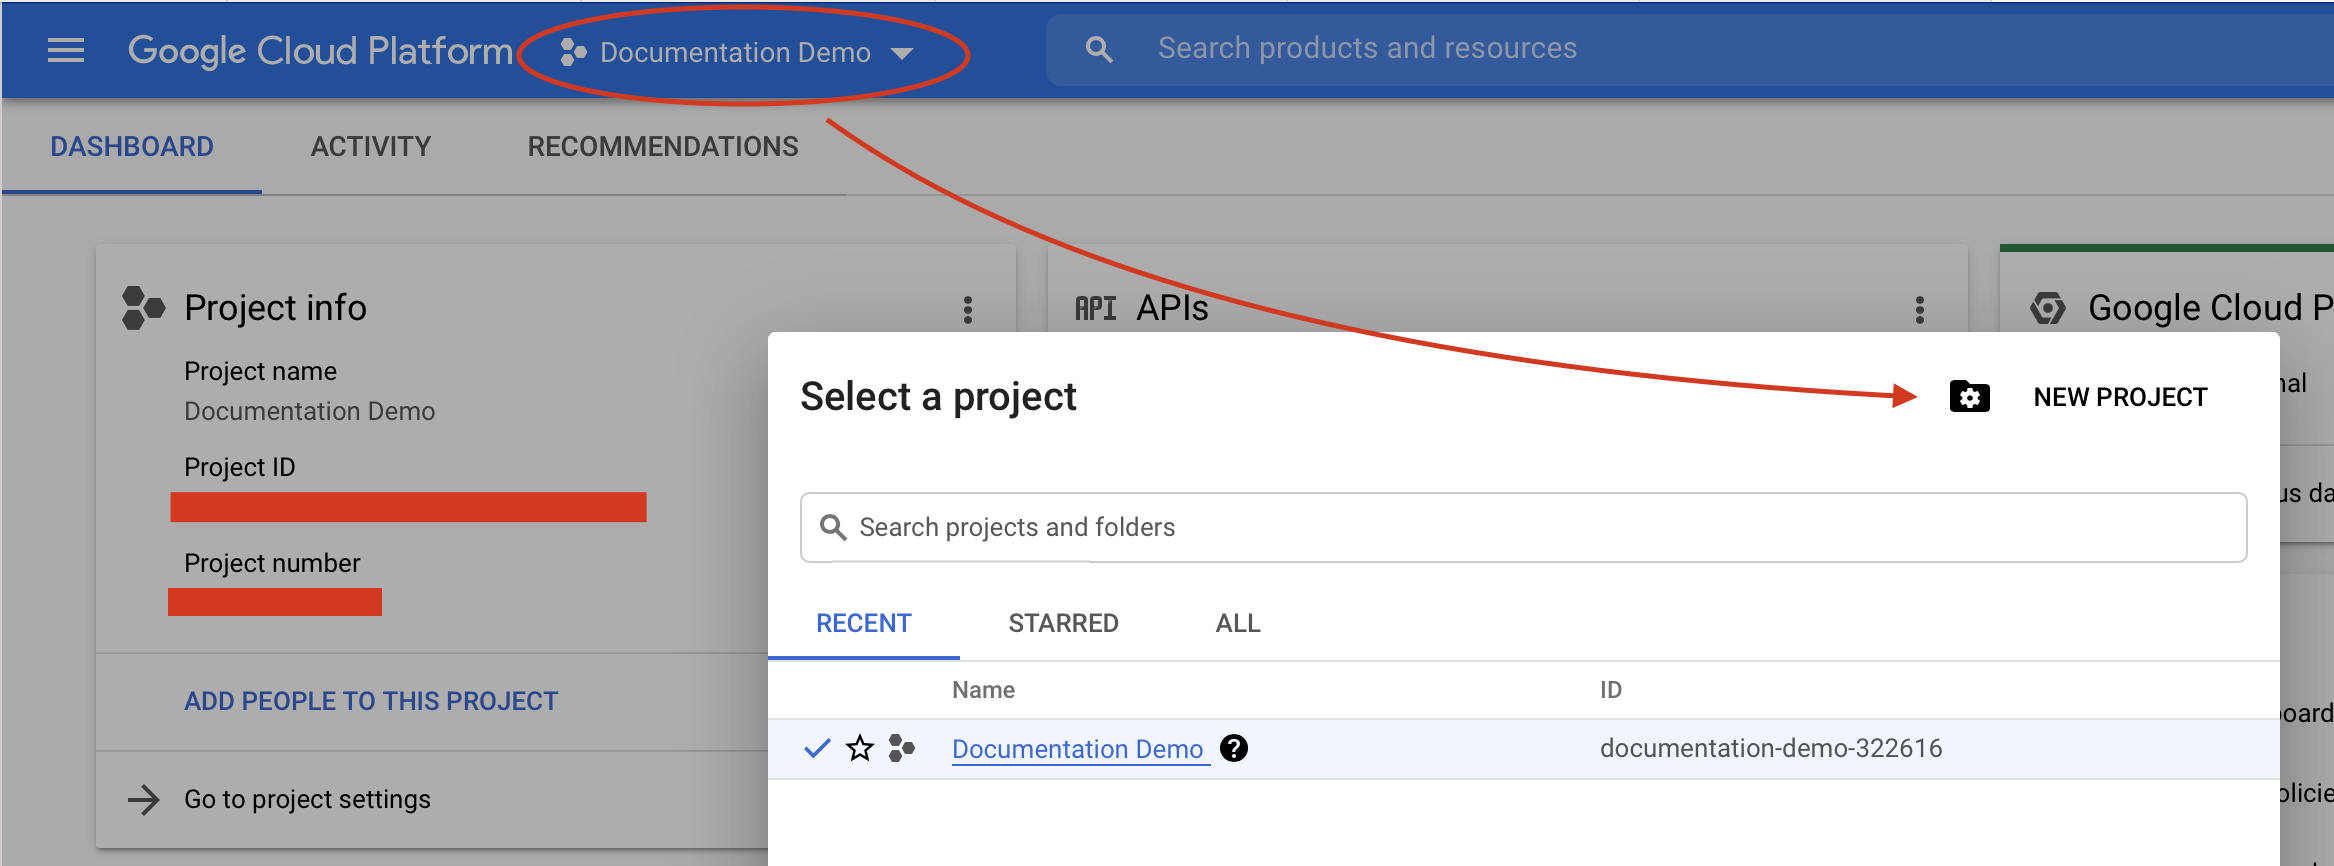
In your Google Cloud account we recommend creating a new project and you can do so by selecting the project drop down in the top left of the main console page. A modal should open and you'll find a 'New Project' button.

note
Creating a new project will make removing all the resources you create very easy. This is especially useful if you don't plan on keeping your GKE after this guide.
You need to ensure that billing is enabled for your new project. You can confirm this here
If you're new to Google Cloud, enabling billing does not necessarily mean that you will be charged. New users should still be offered a free trial period and potentially a credit towards your evaluation of Google Cloud
Enabling Google Cloud APIs#
In Google Cloud, search the following in the search bar or in the navigation menu in the top left:
- Artifact Registry API
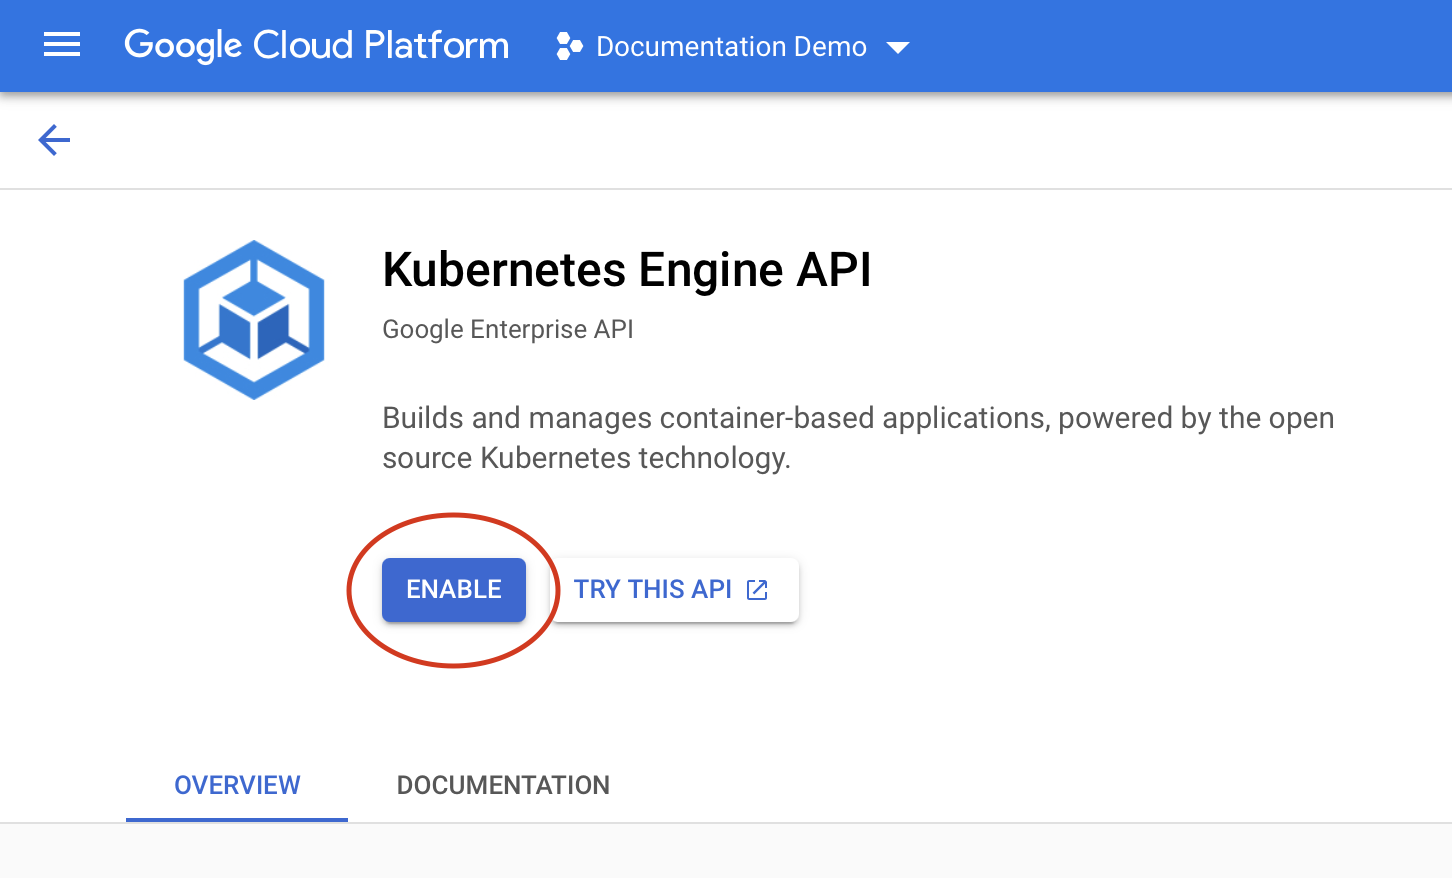
- Kubernetes Engine API
And click the 'Enable' button that appears on each API page

Creating a new cluster#
Open the Google Cloud shell available to the right of the search bar on any dashboard page.

The shell comes with many tools preinstalled for you including:
gcloud: The primary command-line interface for Google Cloudkubectl: The Kubernetes command line tool for interacting with your clusters
Within the shell we'll first set some default values for gcloud that will make creating the cluster much easier. For each command replace the {example-values} (including {}).
important
This project-ID is not just the project name. You can find it by selecting your project in the dropdown in the top left of any Google Cloud dashboard, or even in the shell terminal itself.
With gcloud configured with defaults you can now create a new cluster with a single gcloud container clusters command:
This command will take a few moments to run. When the cluster creation is done you should see the following log (or one similar) in the shell terminal: kubeconfig entry generated for {your-cluster-name}
If you don't see any log like this, then run the following command to configure kubectl with your new cluster manually:
Congratulations! You should now be able to interact with your new cluster using kubectl, for example, if you'd like to see the nodes created for you run: kubectl get nodes
You can also view your cluster in the GKE dashboard in the Google Cloud console. Simply navigate to Kubernetes Engine page and select 'Clusters' in the left hand side panel.
To delete this cluster and clean up your Google Cloud resources, simply run:
You'll be prompted if you're sure you want to delete your cluster. Just accept and wait for the deletion process which will take a few moments.
You can now proceed to our documentation on connecting to a cluster